The Story of the Dekalb Egg Layer
Dekalb and The American Dream
The Dekalb story is a classic example of American pioneering and entrepreneurial thinking. Success in developing and commercialising hybrid seed corn in the 1930’s, and early 1940’s, prompted Dekalb Agricultural Association to explore whether hybridisation could be applied to poultry. President Tom Roberts Sr. and Ray C. Nelson, v.p. of the newly-formed poultry division, set out to develop hens with superior egg-laying performance for the nation’s farmers and layer producers.
Dr. E. E. Schnetzler of Purdue was hired in 1945 as Dekalb’s director of poultry research. A research farm was established, and in the 1950’s, research concentrated on further improving the efficient white egg layers.
By purchasing the J.J. Warren company in 1971, Dekalb gained access to an excellent brown egg layer that was colour sexable. As a result, by the 1980’s, Dekalb white and brown layers were being distributed in over 25 countries, and the poultry operation was named Dekalb Poultry Research, Inc. (DPRI). Today, as part of Hendrix Genetics, Dekalb layers continue to be a dominant force in the major layer markets of the U.S., Europe and Japan.
Highly productive and excellent feed conversion
Superb shell quality
Successful in all systems
Excellent livability and easy to manage
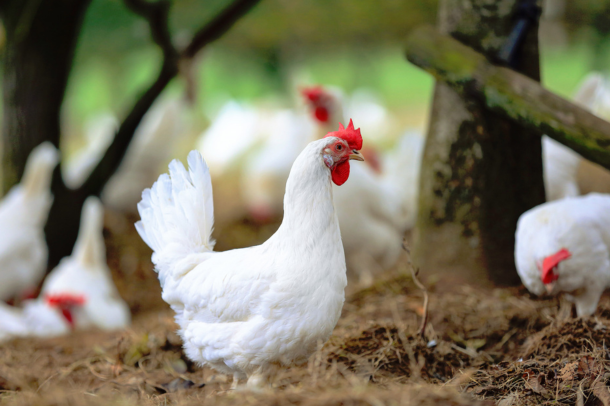
The Dekalb White Today
Combining excellent liveability, extended production cycles, superb persistency, and an excellent feed conversion ratio, the Dekalb White consistently produces high numbers of first quality eggs, per hen housed.
Docile behaviour and excellent livability allows the Dekalb White to adapt easily to a variety of environments and housing systems. Dekalb White eggs are strong shelled, with excellent internal quality, making them suitable for both table eggs and egg processing markets.
Managing Dekalb Egg Layers
A full management guide pdf is available for download below.
Downloads
Here is some useful information from our guides.
Rearing Period
Good rearing is needed to reach the best genetic potential as it directly affects the flock’s performance.
- A good growing period which keeps the chicks in their ‘comfort zone’ will enhance viability and production levels during the laying period. The same type of production housing system should be used for rearing. The birds are easily acquainted with the production house and its equipment after transfer, and overcome this stressful period smoothly. Ideally the house should be empty for at least 14 days after all the traces of the previous flock have been cleaned out. It should be disinfected and dry.
- Litter should consist of wood shavings or chopped straw of good quality. Litter should be dried and friable and be approx. 30°C at the time chicks are placed on to the floor.
- Perch surface per bird should be 5 cm. The first accessible level must be at 20 cm height and must be introduced before 4 weeks.
- Partitions can decrease competition between birds for feeding and drinking and can have a positive effect on behaviour.
- Feeders should be easily accessible. They should distribute the feed rapidly and enable the birds to finish it to encourage feed intake capacity. Feed intake must be measured.
- Drinking systems should be disinfected and washed before the flocks arrival. They should be easily accessible and provide water of good quality. Nipples must be suitable for day old chicks. Providing supplementary drinkers during the first days of life promotes water consumption. Drinkers should be cleaned daily during the first 2 weeks then once per week.
- During the first two days tepid (20-25°C) water should be used. Water consumption must be measured. For infrared beak treated birds, we recommend using a 360° nipple or providing open water for the first week.
- Feed and water monitoring systems are recommended.
- Ventilation requirement is 0.7m3/kg bw and the maximum ventilation requirement is 3.6m3/kg bw.
- Lighting systems must be independent, dimmable and programmable. They should be placed on strategic places: above perches, slatted area and above the floor. Light intensity should be uniform.
Body weight at 5/6 weeks is the most important determinant of pullet quality. It is extremely important to follow Hendrix Genetics body weight recommendations during the life of the birds.
Uniformity of the flock should be very good to facilitate management and stimulation.
Growing After 5 Weeks
Because of the sensitivity of egg laying chicks to day length, lighting programmes are used to encourage growth, and control the birds’ sexual maturity. Never increase day length between 6 weeks of age and the start of light stimulation. Timing of light stimulation should always be based on body weight, not on age
When pullets are reared in dark houses, use a slow step-down lighting programme in order to maximise growth during the first weeks, and keep a constant light duration adapted to growth performance or the sexual maturity expected.
When pullets are reared in open system houses, control of sexual maturity is difficult to achieve. Darken the poultry house and use a lighting programme taking into account the natural day length at the moment of transfer. Total light duration must never be shorter than the longest natural day length in the period between 6 weeks of age and light stimulation.
Feeding Chicks in Rearing
- Do not change the feed if birds do not reach the standard bodyweight.
- Promote early growth, skeleton and organ development by providing feed in crumble form for starter diet.
- Use a good coarse mash grist for grower, pullet and pre lay feed.
- Develop digestive tract and eating capacity (feeding management/grit).
- Feed specifications for alternative production pullet do not differ from intensive system recommendations.
Litter Management
The top priority is to keep the litter dry. Well managed ventilation and good gut health are key points.
Litter should be friable and ‘moveable’. The birds help to maintain this condition by scratching and dust bathing. Scratching may be encouraged by providing a small daily ‘scratch feed’ of whole grain.
Water pressure in drinker supply lines should meet suppliers specification to avoid leakage.
Where nipple drinkers are provided, they should be suspended so that the birds have to reach up to drink.
Litter depth should be 5 to 10 cm depending on the type of floor.
Additional litter should be added, on top of the existing litter, in order that moisture content is kept low.
Wet patches resulting from water spillage should be promptly removed.
During cold and/or wet weather, it is important to work the litter regularly with a fork.
Transfer to Laying House
This is a stressful period for the birds due to handling and transport involved in movement from rearing to laying facilities, and the change from a rearing to a laying environment. This should be done at 4 weeks (ideally) and certainly no later than two weeks before egg production starts. This will give the bird enough time to adapt to the situation in the new environment.
Preparation – Rearing Farm
Birds must always conform to the breed body weight.
Light intensity and rearing temperature should be adjusted, over a period of 2 to 4 weeks, and must be equal to the level in the laying house. 2 weeks prior to transfer, birds should not be handled, except for routine uniformity and bodyweight checks. Birds must have every opportunity to grow, even during this critical period.
Insoluble grit should have been provided for the flock, ideally during the entire rearing period, but at least 2 weeks prior to transfer.
Feed withdrawal before departure should not exceed 6 hours and should be adapted to transport duration and climatic conditions.
Preparation – Laying Farm
An appropriate terminal hygiene programme must be implemented to avoid cross disease transmission.
Maintenance and repairs to complete before the arrival of stock:
- Flush the water system and provide fresh water the day before arrival of new stock.
- Where nipple lines are used, ensure the height is slightly below the back of the birds (for the first 7 days), then raise to ensure birds ‘comfortably stretch’ to use the nipples. Bell drinkers should be filled to double the normal depth, and lowered to a height of 20cm above floor level, for the first two or three days.
The house should be dried prior to the arrival of the new flock and preheated in cold season.
An ideal time for transfer is during the early morning. If the pullets are unloaded by the time their day would have started on the rearing farm, disturbance to their routine of drinking and eating is minimised.
Transport vehicles and equipment must be clean and disinfected.
The whole layer flock should be transferred within the same day.
The procedure should be fast with the loading of the hens, transport and unloading all conforming to local regulations. Additionally, every effort should be made before and after transfer to maintain water and feed intake according to the normal routine of the flock.
Precautions should be taken to minimise undue exposure of the layers to wind and rain/sun during transfer procedure.
After Housing
The period of the first 48 hours after housing is a critical period. Close supervision and observations are required to ensure the normal behaviour of the entire flock.
The following points should be noted:
- Water consumption– normal drinking habits, within 6 hours after arrival.
- Temperature- ideally 15°c, 18°c is the maximal temperature. It is important that birds do not become chilled but they must have fresh air.
- Feed consumption– increasing appetite/intake.
- General attitude of the flock- at first it will be quiet, but should gradually become more active and ‘talkative’, but not frenetic or hyperactive.
- If slats are incorporated in the house, the birds have to be encouraged to perch during the dark night period. This may take some time initially (3 to 7 days), prior and during lights off.
- Nest boxes must be closed until you see the first egg. Open them 2 hours before the main house lights and keep open until late afternoon.
- Light intensity must be high (refer to lighting chapter).
- Dim the light gradually at light off (refer to lighting chapter).
- It is recommended to keep birds on the system for a few days if they were not reared on a partly slatted house (according to local regulations).
Laying Period
Buildings and equipment for production
Housing Equipment
It is important the birds are reared in the same system as they will experience in production.
Slats
Slats, either plastic, wooden or metallic should be adapted to the building design. They should be on a level which provides easy access for the birds, and which also accommodates manure throughout the whole production cycle. When higher than 90cm, use the perch rails to help the birds’ access them, as drinkers, feeders and nests are placed here.
Feed and Water
We recommend a feeding system that distributes feed rapidly and enables the birds to finish all the distributed feed each day. It helps the correct feeding technique with a rapid increase of feed intake at start of lay, no fine particles accumulation and feed intake control. Rapid floor mounted chain feeders seem to be the best option. If pan or tube feeders are used they should be adapted properly to this technique.
It is best to use the same type of drinkers in pullet rearing and egg production (for example nipples to nipples).
The feeders and drinkers should be easily accessible and recognised by the laying hens, their height adapted to the size of the birds. If slatted areas are used in the house, place the slats in front of the nests. The drinker line attracts the birds to the nest boxes.
The standards for drinking and feeding space given in the table of stocking densities and environment must be followed from transfer until depletion.
Remember: If the hen does not drink enough for any reason, it will not eat enough and so the growth, uniformity and production of the flock will be compromised.
Nests
Use one comfortable individual nest for 5–6 birds or 1 m² of collective nest for 120 birds. The individual nest should be strawed. Any nests must be clean and well maintained. A dim light (0.3-0.5 lux) placed in the nests or over the slats switched on 1.5 hours before lights on could be used to avoid floor eggs.
Perches
Perches improve the welfare of the birds. They also help to increase the usable surface per bird and decrease floor density, train the birds to jump in the system and allow an escape to aggressed birds.
Minimum perch length per bird is 10cm. The first accessible level must be at 20cm height.
The perches should be situated on the slats to maintain good litter conditions. Distance between perches should be 40cm and a slope of 45°.
Partitioning and Fencing
Partitioning the house into different pens helps the bird distribution and makes the flock management easier.
Fencing – Outside:
Perimeter fencing is a requirement to protect birds from different predators and to aid security and bio-security.
A fencing example could be a wire type mesh construction, 2m high with an overhang of 30cm placed at an angle of 45 degrees to the vertical on the outside of the fence. The bottom of the fence could be approx 30cm underground to act as an anti-tunneling barrier. Alternatively commercially available safety electric fencing can be used.
For range management, a more practical and lighter material like electrified netting can be used.
Heating
If possible keep the laying house temperatures between 18-22°C, though the hens can withstand lower or higher temperatures during winter and summer. Keep in mind that at lower temperatures a laying hen increases feed intake and at higher temperature decreases the feed intake. A temperature change of 1°C will translate to approximately 1.4g change in feed intake.
To avoid temperature stress in wintertime, it is advisable to preheat the production houses before transfer of point of lay pullets, up to 18°C.
Make sure you always follow minimum ventilation requirements to avoid damage by high CO2 and NH3 levels. Lower temperature is less harmful than high CO2 and NH3 levels.
Ventilation
A major priority of ventilation is the provision of fresh air. If the air in the poultry house is stuffy – humid – smells or laden with dust, then the rate of air change is too low.
The minimum rate of air change, in order to supply the birds’ respiratory needs is 0.7 m³/hour/kg live weight. Good working ventilation removes the excessive moisture – maintains a good litter quality, removes the dust, maintains a sufficient oxygen supply and removes noxious gases from a chicken house.
Ventilation Systems
A free-range house can be ventilated mechanically, naturally, or by a combination of both systems. Fundamental to any system is the provision of finely adjustable air inlets, usually at eaves level, on both sides of the house, and outlets in the apex of the roof. Some houses may be cross ventilated, with inlets to one side of the building and the extractor fans on the other side.
Air Circulation
When the rate of air change is low, it is best to keep a good air circulation in the house. It helps a better distribution of the fresh, as well as the warmer air, throughout the whole house It also allows a better moisture removal from litter and improves the birds’ comfort in case of hot weather. Be careful of direct draughts on birds. The use of an axial fan can be a good method of effective air circulation.
Litter is also considered to be one of the wellbeing factors for birds, allowing them to scratch, dust bathe and be more relaxed.
Slatted areas covering an enclosure, to which the birds are denied access,should be used for storage of manure. This separation of manure from the litter makes the task of maintaining the litter in good condition much less onerous, particularly during wet and cold weather.
The litter adjoining the slatted area should be well lit, in order to deter floor egg laying.
Litter Management
The objective of the litter management is to maintain a dry, friable and odourless material, attractive to the birds for scratching and dust bathing.
The type and quality of the litter are important for the hens and the house climate. Materials like sand or gravel, wood shavings, wheat spelt or rye chopped straw, bark mulch or coarse wood chips can be used as litter. Sawdust is not suitable as once moistened it compacts, becomes immovable and does not release moisture to the atmosphere.
Neither material should be contaminated and should not be moved on site from flock to flock. It should be uncontaminated when spread in the poultry house. Straw should be chemically treated so that it is free of moulds, aspergillus species in particular.
If the system allows it, frequently remove accumulated litter/manure. This prevents floor eggs and improves the environment. Avoid wet and caked litter.
Lighting Systems
The lighting system in lay must be designed to ensure independent lighting control of the different areas. We advise the creation of three zones, one as a scratching area, one as a slats area and one above the nests.
All lighting lines must be dimmable and programmable. The dimming ability of the system will allow the control of behaviour inside the building and to avoid dark areas where bird could lay on floor.
An independent programmable lighting row encourages birds to climb/move on to slats and not to sleep on the scratching area. This point is important to avoid floor eggs.
Nest lights could be used with brown birds to attract them into the nest before the general light on.
Lighting systems using bulbs with too low frequency will result in flickering light which will stress birds. Warm colour type (yellow-orange spectrum) must be used. In the event of negative bird behaviour, the use of lampshades and red painted light covers can help.
Basic Growth Concepts - Body Weight
Development & Uniformity
From transfer to around 30 weeks of age the birds need to achieve at least 300g of body weight gain. Growth after 30/35 is mostly due to fat deposition, and its excess will be negative for lay and feed conversion.
A lack of bodyweight gain after transfer makes hen less robust against environmental variations (disease, heat, etc).
Flock uniformity has to be maintained in order to avoid extremes of body weight leading to poor laying performance.
Prelay Key Targets
Increase Layer Bone Mineralisation
The prelay period is characterised by an increase of the calcium concentration of the feed.
The first objective is to reinforce the mineralisation of medullary bone and calcium storage before the beginning of the lay.
The second objective is to prevent demineralisation of early layers in the flock. The calcium concentration of a grower feed would not be sufficient to compensate the calcium exported for the eggshell of these birds.
In summary, a higher calcium level on pre lay diets will prevent layer demineralisation of early birds, reinforce medullary bone mineralisation before transfer and ensure good eggshell quality in the last phase of lay.
Transition to Layer Feed
Prelay diet constitutes a step, in terms of feed composition, between rearing and laying feed. The abrupt increase of both fine as well as coarse calcium carbonate particles has a strong influence on feed palatability and presentation. There is an increased risk of low feed consumption after transfer if pre lay feed is not used. We strongly recommend the use of a prelay diet to accustom bird to layer feed.
Growth Continuation, Lightest Bird Catching Up and Maintaining Uniformity
The birds continue to grow during the prelay phase, for the lightest ones it is the last chance to catch up and the earliest can start to lay. Both groups require a high nutritional feed to assist correct growth and production. Without using an adapted feed, uniformity of the flock could decrease.
Working with the Birds after Transfer
- Put the birds close to drinkers and feeders at transfer.
- Keep the flock on a slatted area for a few days, it helps the birds to get used to slats, find drinkers and feeders but also perches and nests.
- Light intensity must be higher compared to rearing building.
- Lighting management encourages the birds to move on to the slatted areas to rest and sleep. Switch off the lights gradually starting from floor ending at a top tier of aviary.
- Place the birds found on litter just before dusk on to the slatted area during the first week.
- Collect the floor eggs several times per day at start of lay, until the level becomes acceptable.
- Automatic nests must be open at least 2 hours before lights on. After all the eggs are laid close the nests (to be adapted according to the flocks laying behaviour). It helps to keep the nests clean and to remove all birds from them.
- Continue to check the growth by measuring body weight.
- Monitor feed and water intake.
- Watch out for birds that do not find the drinking/feeding points. Look for these 7. When released, encourage the flock to get back to slats or aviary system in the evening.
- This type of transfer needs much more physical work from skilled workers.
- Special attention is needed for coccidiosis prevention or treatment.
Feed Presentation
Birds have a strong preference for coarse particles; they tend to leave the fine part of the feed. Consequently, the feed needs to be uniformed, with a maximum of 10% coarse particles above 3.2mm and 15% maximum of fines particles below 0.5mm. Too high proportion of coarse particles will lead to feed sorting, uneven bodyweight and laying performance, too high proportion of fine particles will decrease feed consumption.
Birds also do not like variation in feed presentation. Similarly to fine particles, variation in feed presentation decreases feed consumption.
Addition of 1% oil to mash layer feed, is recommended to improve feed presentation. Oil sticks the finest particles together and makes them easily ‘eatable’.
In case when the feed intake is very low or the feed presentation is poor, crumbs could be used, they are easy to take by beak and each particle is nutritionally balanced. Crumbs increase water intake and wet droppings and a change from crumbs to mash, can decrease feed consumption.
Feed Distribution
We recommend the distribution of feed equal to the amounts of feed that the hens finish each day. The feeders should be emptied daily at the beginning of the afternoon. This technique leads to decreased feed selection and to increased mineral and vitamin consumption usually found in the fine particles of feed
Feed distribution during the intensive oviposion time of a day increases dirty eggs and floor eggs.
For eggshell quality reasons, a minimum of 60% of the feed, needs to be distributed in the afternoon.
This programme needs to be adapted according to observations and the feed distribution equipment.
Lighting Programme
High intensity after transfer
Increase the light intensity just after transfer. This encourages hens to discover their new environment (nipples, feeder and nest location) and stimulates feed consumption too. When feed consumption is sufficient, light intensity could be reduced.
Prelay Diet
Prelay diet utilisation facilitates the transition from rearing to production diets that are very different especially in type and amount of calcium carbonate concentration and palatability linked to this fact.
Digestive Tract Development
A proper feeding technique in rearing helps to develop the digestive tract so that the birds is well prepared to eat enough during lay.
Crop
The importance of the crop as a feed storage organ is recognised especially after transfer when bird ought to increase it’s feed intake from 80 to 120g. A poorly developed crop reduces this feed intake capacity. The concept of meal feeding technique with empty feeders once a day leads to faster feed consumption and better crop development. (refer to ‘Feeding Management’).
Gizzard
Pullet feed presented in coarse particles mash helps gizzard development. Coarse limestone particles in prelay feed or the use of grit in rearing also help to develop gizzard.
Insoluble Grit
Grit of proper particle size was once considered essential. Now, with the mash feed, it is considered unnecessary, grit stimulates the gizzard muscle development in rearing, stimulates digestion and improves feed intake capacity.
Where the hens eat litter and feathers and have no grit, physical damage of the intestinal tract may occur. It is recommended to provide 3g of insoluble grit per hen once a month, with a particle size between 4 and 6mm.
Lighting During Lay
The objective of the lighting programmes during production period is:
- To encourage growth at start of lay
- To counteract the harmful effects of decreases in natural day length
- To control the liveability through the light intensity management
Whatever the type of laying house (natural or artificial light), the golden rule is to never decrease day length (interval between lights on and lights off) after start of lay.
The body weight plays a major role in the determination of the egg weight profile during all the laying period, the light stimulation has to be done according to the observed body weight.
The minimum bodyweight reference is1100 to 1150g for the white egg layers
Uniformity is also an important parameter to consider. If uniformity (+/-10%) is below 80% for brown and 85% for white, delay the light stimulation.
Light Intensity
A low light intensity from 5 to 10 lux is required for production. The most important aspect is to achieve the best possible uniform light spread. Standard light bulbs with dimmer are preferred.
Floor Eggs Prevention
Floor eggs prevention is a key factor for flock success.
The two main points are:
- The nest must be more attractive and comfortable than other parts of the hen house.
- Access to nest has to be easy for birds.
General Management Advice
Management is one of the key factors to prevent floor eggs.
- Light has to be well spread in the laying house, shadow areas need to be avoided. Birds preferentially lay in all darkened area.
- Limit the number of corners – place barriers.
- Lateral light should be off first, this will encourage birds to go close to the nest and to sleep on slats and lastly, the central light should be switched off.
- Ensure all birds sleep on the slatted area/system from time of placement, allow access to the litter area within a reasonable time scale – 2 weeks max.
- According to the breed used and the lighting program applied, a variable percentage of birds will lay before lights on; the probability to lay on the floor is higher for these birds. Night light in the nest encourages these early birds to go into the nests for laying before the general lights come on.
- Installation of deflection barrier between the nest boxes enables the birds to be evenly distributed, diluting the pressure in the nest boxes. This also helps to prevent overcrowding of nest located near to partitions.
- Where the legislation allows it, a night flash during the dark period (for example 1.5 hours of light, 3 hours after light off), will delay the lay of one part of the flock and reduce the competition in the nest.
- In some situations adding one extra hour of light in the morning could solve floor eggs problems.
Important Behaviour
Just before laying, approximately 30 minutes before, birds express a specific behaviour called prelaying behaviour which consists in 3 phases:
- Active nest searching
- Choice of nest
- Nest creation
Birds shouldn’t be disturbed during the process of searching for a nest otherwise they stop the search.
Fibre for Free Range Egg Layers
Birds have a specific requirement for fibre. Deficiency in fibre can lead to feather pecking. A poor feathering observed in a flock without feathers remaining on floor could be a sign of a lack of fibre. A good supply of fibre improves feathering, decreases mortality, improves gut health and digestion.
Fibre provided to layer must be insoluble fibre and as much as possible with a coarse presentation.
Fibre could be provided through the feed by oilseed meal (sunflower / rapeseed), alfalfa (or lucerne), and oats. Cereal byproducts could provide a good amount of fibre in the feed, but their presentation is usually to fine to have ‘structure effect’ on the digestive tract.
Fibre could be provided directly in the building. We advised to use coarse fibre as straw, alfalfa (or lucerne), wood shavings, rice/oat husk, silage, etc. These materials must be available in the building through round feeder or directly as ball on the scratching area. Birds must have a free and ad libitum access to fibre sources. We advise to not spread directly fibre on the floor. To prevent floor eggs, fibre supply must be introduced after the peak of production when the birds are well trained to use the nest.
Feed for Birds in Free Range Egg Production
Energy
Considering nutrients requirement, the main difference between cage and alternative production feed is energy requirement. To cover their higher energy requirement, birds are eating more. According to the housing system used, temperature and bird feathering, it is observed feed consumption could be increased by 3 to 20%.
In free range egg production, it is essential for point of lay pullet to reach quickly their mature body weight. Energy intake is usually the limiting factor for production and growth when lay is starting. It is strongly advised to use a higher energy diet from 18 to 30/35 weeks of age. Energy levels of 2750 to 2850 Kcal/kg are adapted for start of lay diet.
After 35 weeks of age, energy concentration must be decreased to prevent fattening, improve feathering and livability (see ‘fibre for laying hen’ section). According to country and raw material availability, a compromise between feed intake/FCR, bird behaviour and bird bodyweight must be found. Classical energy feed range advised after 35 weeks of age, are from 2600 to 2750Kcal/kg.
For all the other nutrients, birds requirement in alternative production are very close to these used for cage.
Protein and Amino Acids Requirements
The daily amino acids and protein requirement values could be estimated from the last review we did on amino acids requirement.
Feeding Management
The feeding management in production should follow several simple rules:
- Hens are grain eaters and have a preference for bigger feed particles. We want them to eat all the components of the formulated feed including the fine with higher concentration of amino acids, minerals and vitamins.
- Birds have to finish their ration every day so that the feeders rest empty for a while.
- Do not disturb the birds with feed distribution during their oviposition time (first 5-6 hours of the day) if floor eggs are observed
- 60% of feed must be distributed the afternoon to promote the calcium storage before the night, ensuring a good eggshell quality.
- To avoid feed particles selection, a minimum of feed distribution has to be done (to be adjusted according to feeding system).
- The last feed distribution 1-2 hours before lights off also encourages the birds to get to the house from range and to the system (slatted area and perches) and to sleep there.
Pasture and Range Management
Good pasture management and range enhancement improves welfare of the birds.
Range Enhancement
The most critical part of the range is the immediate access of the range (first 5/10 metres). It is advised to place large stones or slats immediately adjacent to the pop holes or the winter garden. Trees and shelter provision on the range allows birds to utilise the range better and protect them against climatic conditions.
Pasture Management
The ‘paddock’ grazing system, where the pasture is divided into 3 or 4 paddocks (or more) and grazed alternately for periods of 3 to 4 weeks, is most useful from several standpoints:
The plants have a recovery period, and it is possible to re-seed worn areas.
- When paddocks are not stocked they may be cut, hay even may be taken. It is possible to chain harrow the pasture, breaking up any mat of dead.
- Owing to the break periods, the ground does not become ‘fowl sick’. In particular the development of parasitic worms is kept under control.
It may be necessary to plough areas of ground, allowing exposure to frost and rain, during the winter period, in order to repair soil structure. Reseeding would then be during the early spring. But reseeding can be carried out during early autumn; this is generally preferable to spring planting for grass strength. Reseeding will normally be using hard wearing ryegrass species – these are the most durable.